This code along article will help beginners to get started with the basics of node.js and build restful APIs with proper standards and structure.Prerequisites :
- Knowledge of HTML, CSS / SCSS, JavaScript / jQuery as we will be using these for the front-end part of our application.
- JavaScript Fundamentals like promises, async-await, DOM manipulation will also help.
- Curiosity, interest and a tiny bit knowledge of Node.js, also you need to have node installed on your system. For detailed explanations and installation guide please refer to the following article.
Tools I Use:
- A code editor. I prefer Visual Studio Code as it gives me a complete environment and can be customized as required. Also, it’s the best :P…
- JSON Formatter browser extension to prettify the raw into a readable format.
note: This article might look lengthy but that’s just because I used a lot of screenshots. Beginners often struggle with the MongoDB Cloud Setup and a few other tasks so images will make things a bit clear. So for a better experience try to read this article on a Laptop or a Desktop…
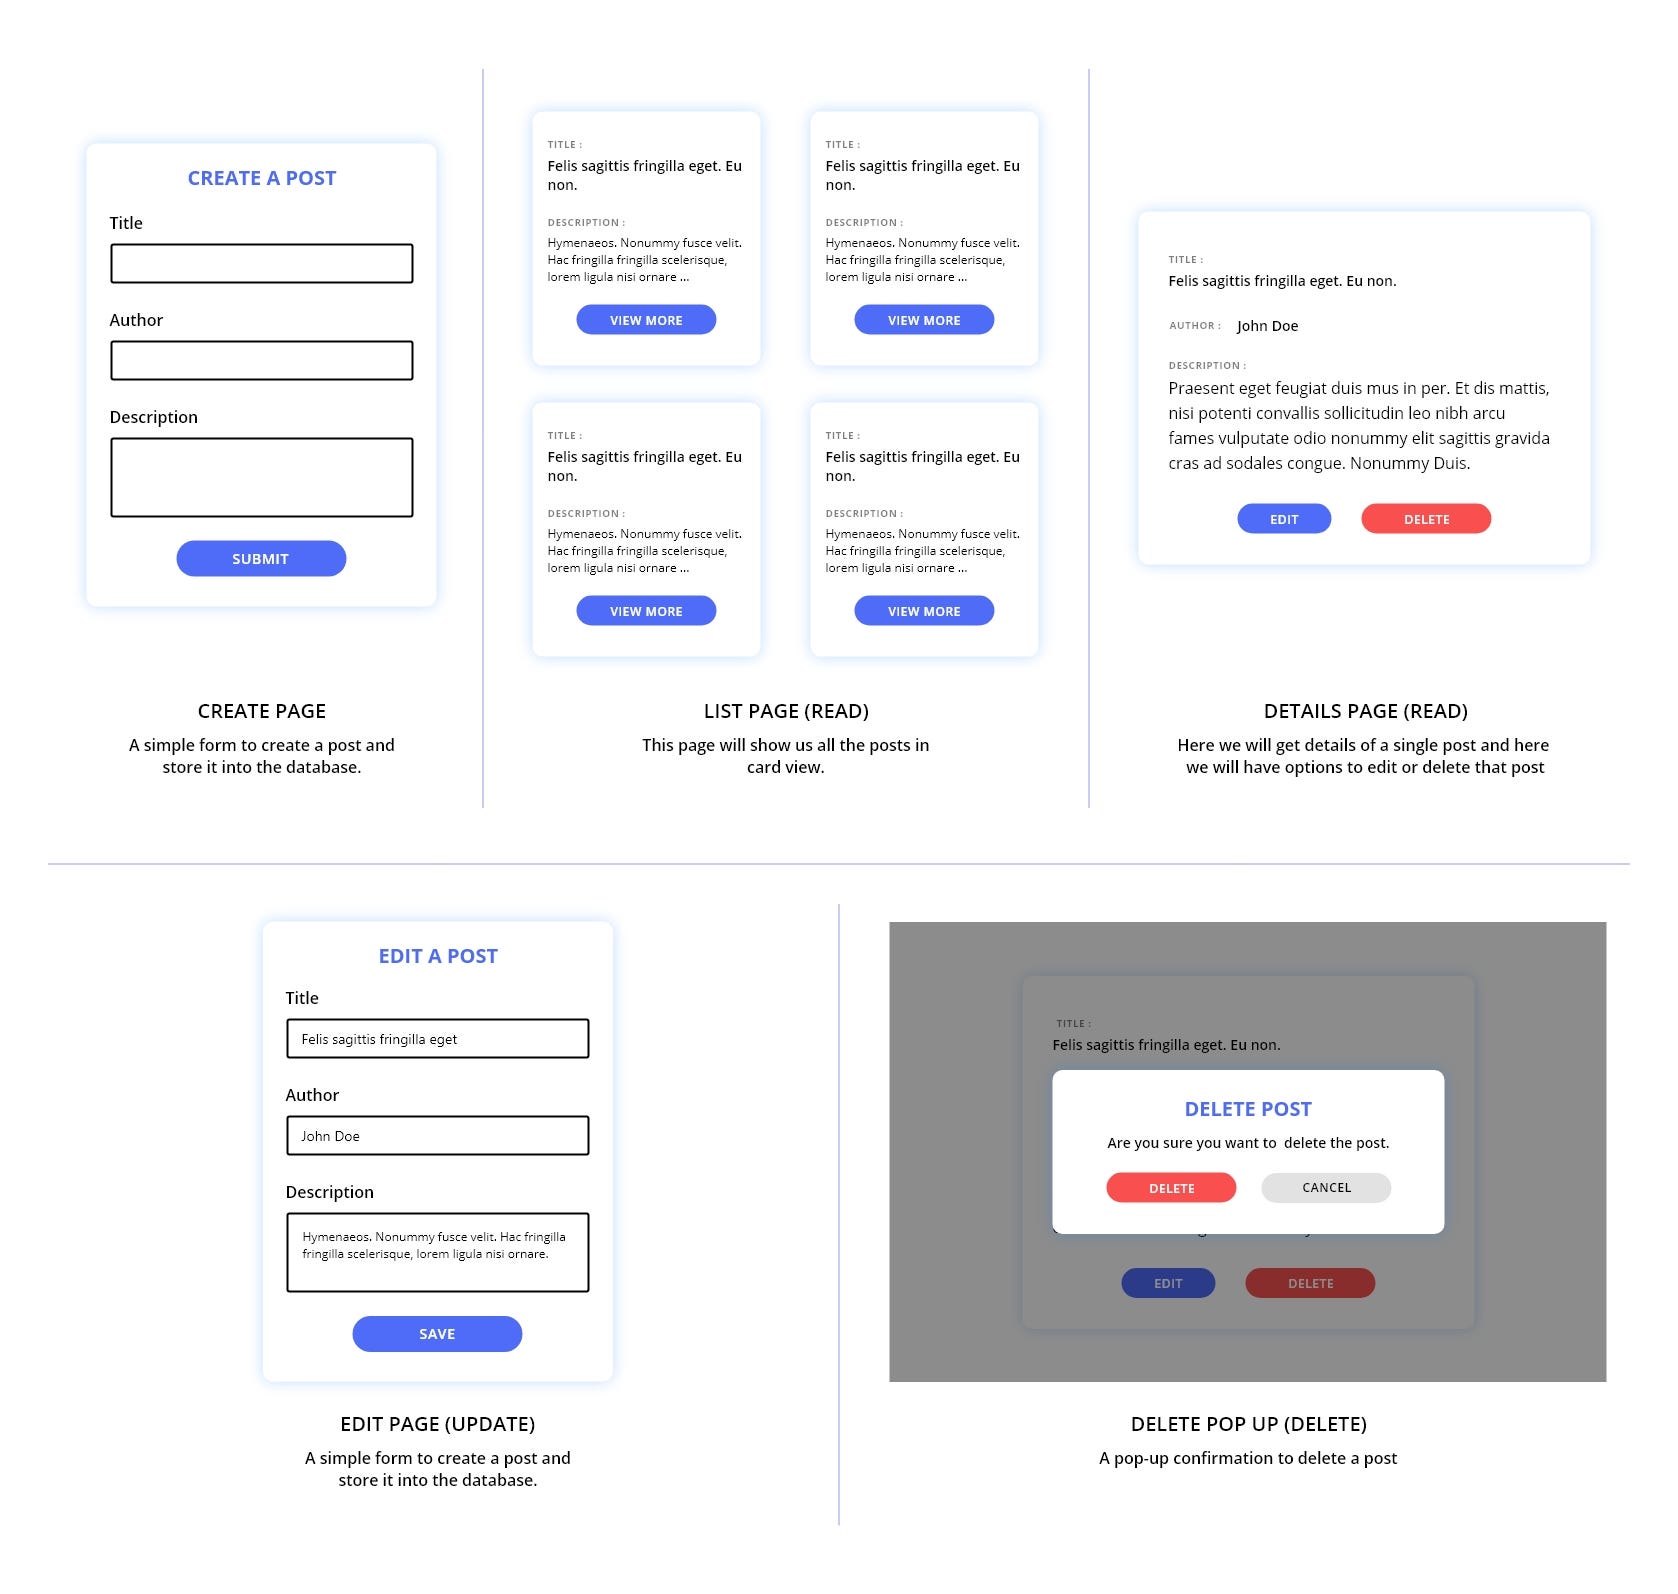
What we’re building :
The following web application :P…

Get Started:
Create an empty folder called “Node CRUD” (this can be anything you want), this will be our root folder for our project.


Create two sub-folders “BackEnd” & “FrontEnd”.
The BackEnd will have our Node.Js backend application which will serve REST APIs
The FrontEnd will have the web application which will consume the APIs, similar to a real-world scenario.
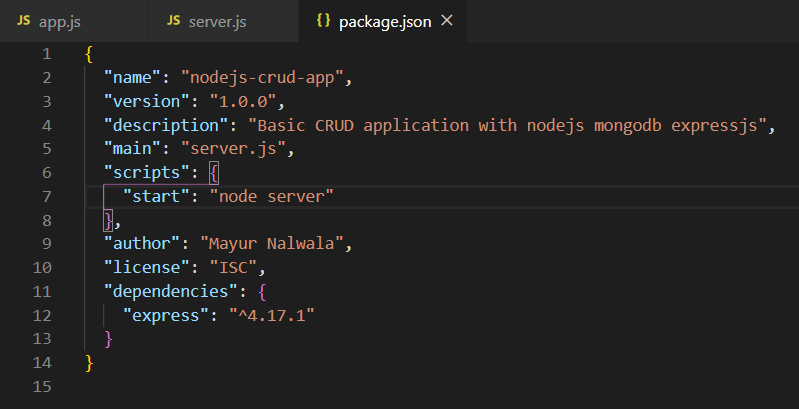
Open your terminal in the BackEnd folder and run “npm init”, this initializes and creates a new node package with the details like package name description author, etc.
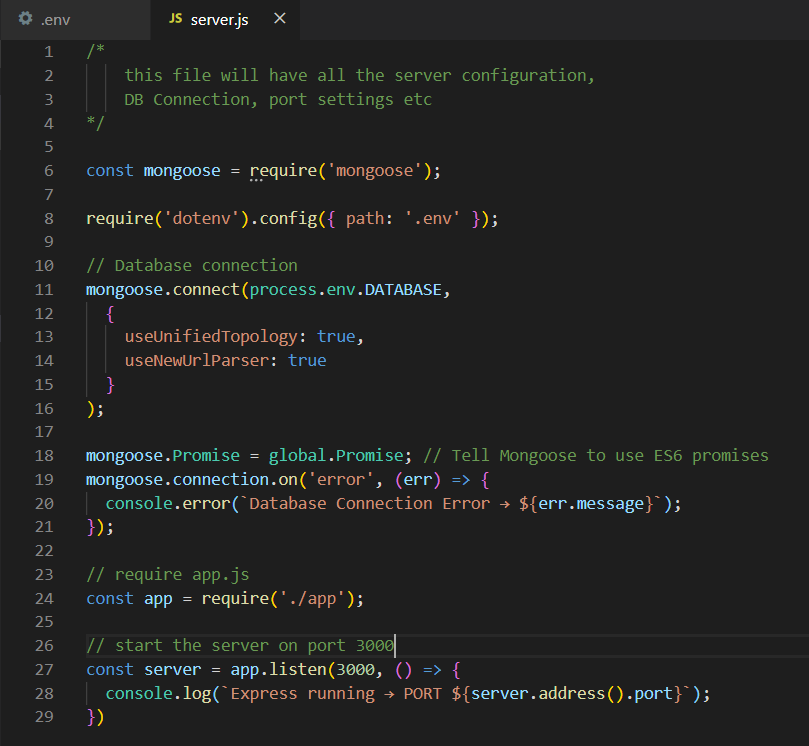
One important thing here is it will ask for the entry point i.e. from which file your application will start. Ideally, it is named index.js or server.js.I name it server.js as I do all my server configuration in this file.

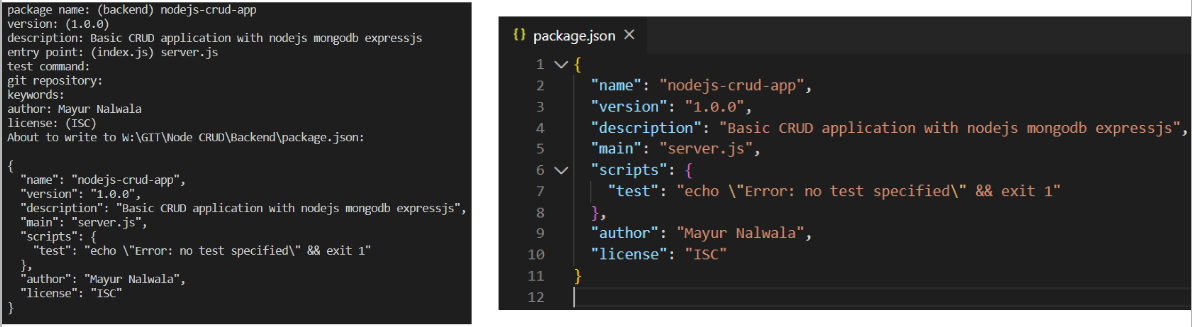
The package.json file contains all dependencies and scripts to run the project.
Next, we will create other required files for our project.


.We start with server.js, app.js & .env.
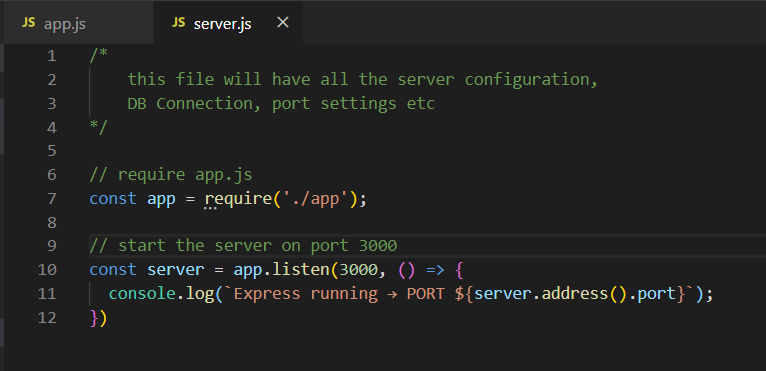
server.js is the main entry point of our project. Here we will make our DB connections, import our app.js and start our server.
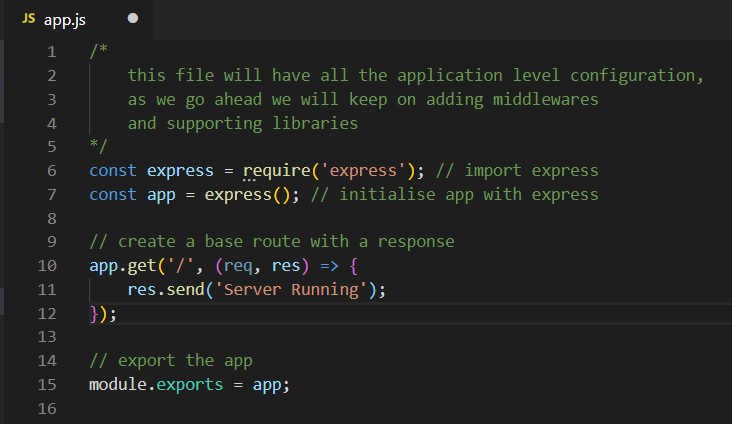
app.js will have the project configurations.
.env is a private file where we keep all our important and non-public things like DB connection links or API keys etc.
Let’s configure our application in app.js, we need to install Express: “npm install express”. After running this command, express will be added to your project environment and in the package.json dependencies.
now we will configure our app.js as follows:

now let’s fire up our server:
first, we will import app.js in our server.js file.
first, we will import app.js in our server.js file.

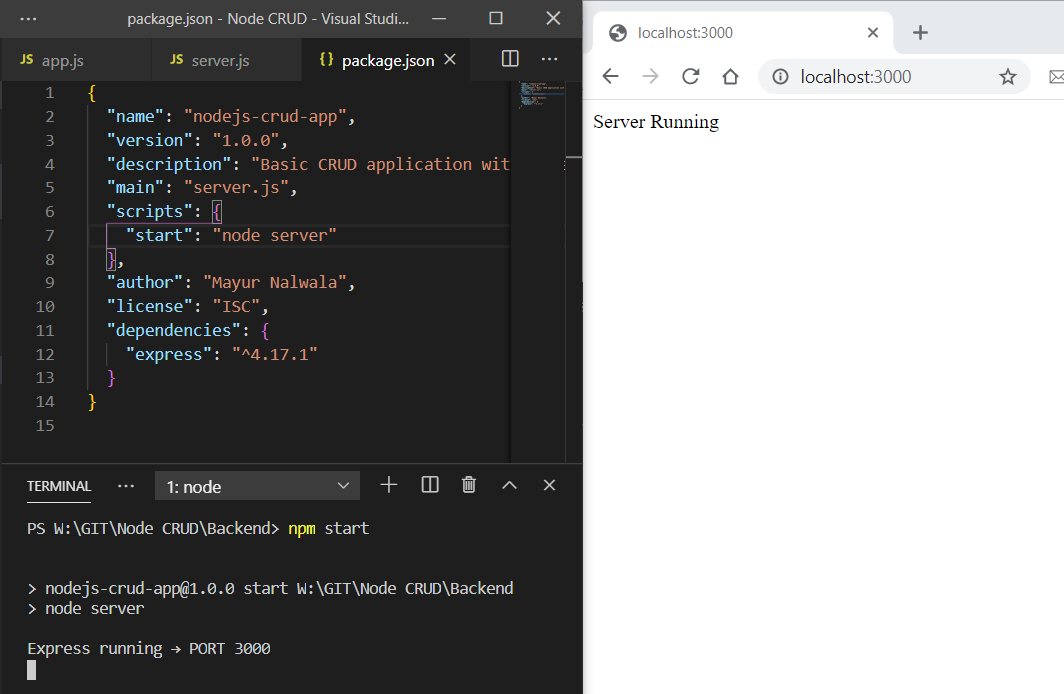
now we are ready to start our server, we just need to add the scripts in package.json.

yep, just run “npm start” on your terminal and you have a node express server up and running on http://localhost:3000/.

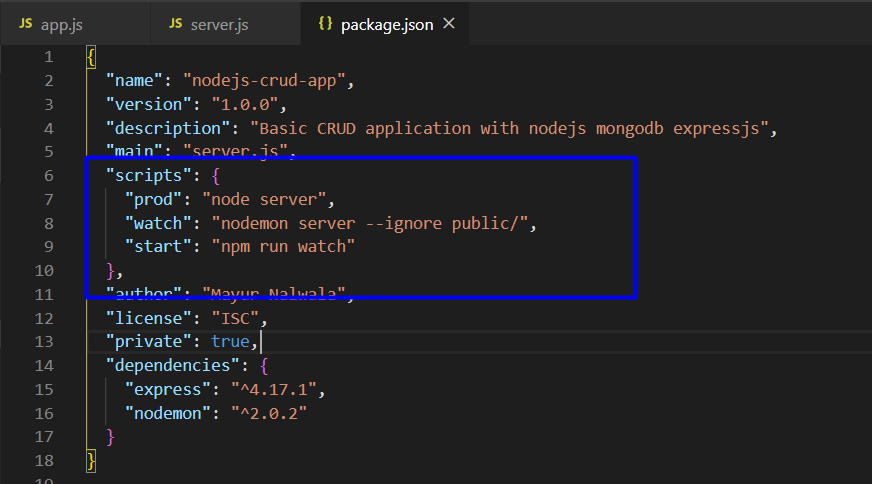
before we go ahead, we need to install “nodemon”, a dependency for our server. With nodemon, we do don’t need to restart our server after every change, nodemon watches our application and restarts our server every time we save any file.
run: “npm install nodemon”, and do the following changes in package.json file.

MongoDB Setup:
- Go to MongoDB Atlas Cloud service page and create an account and login.
- Select the Shared Cluster i.e the free plan option.

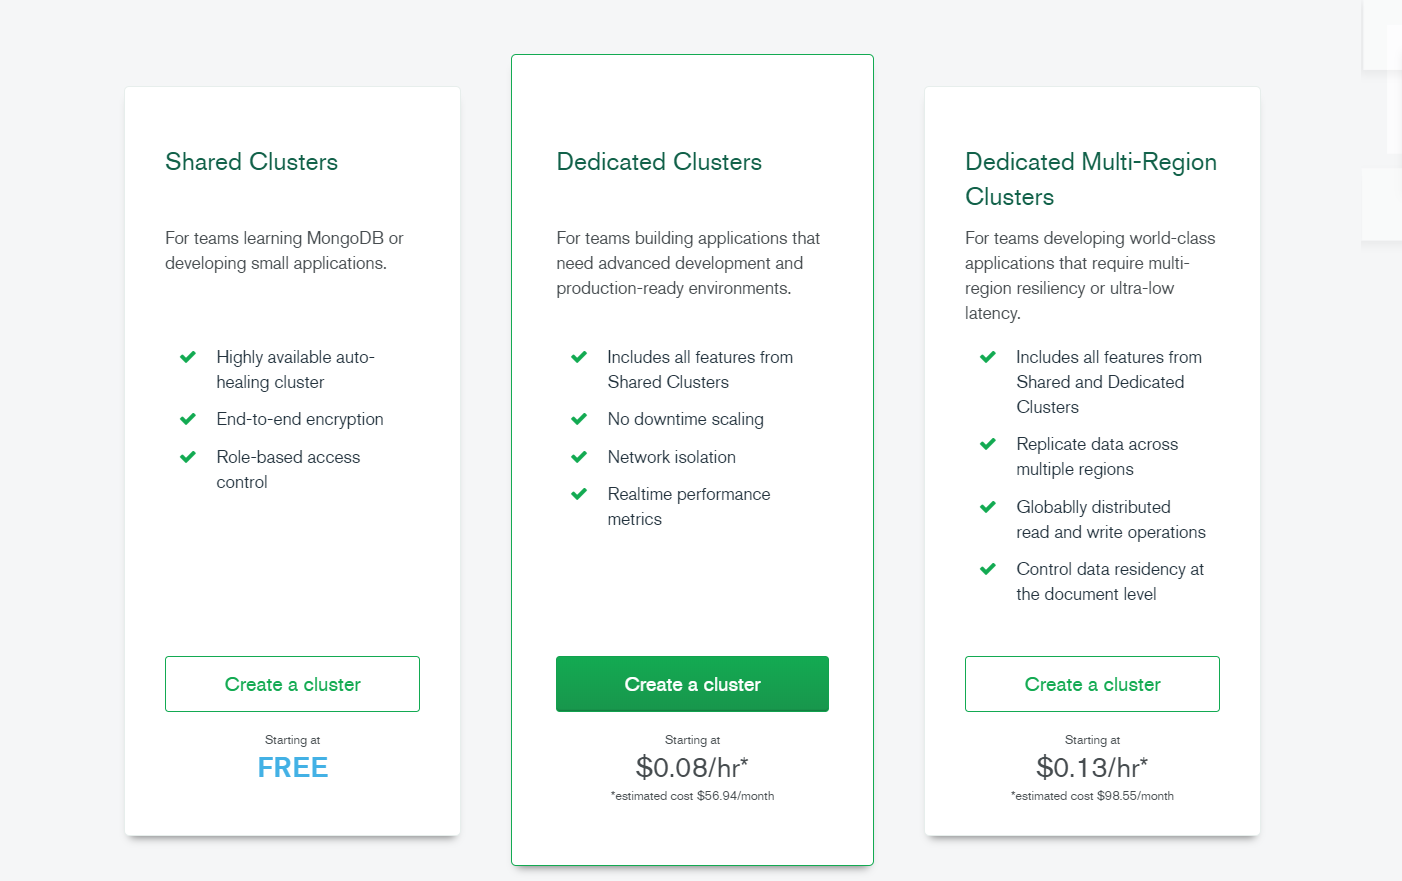
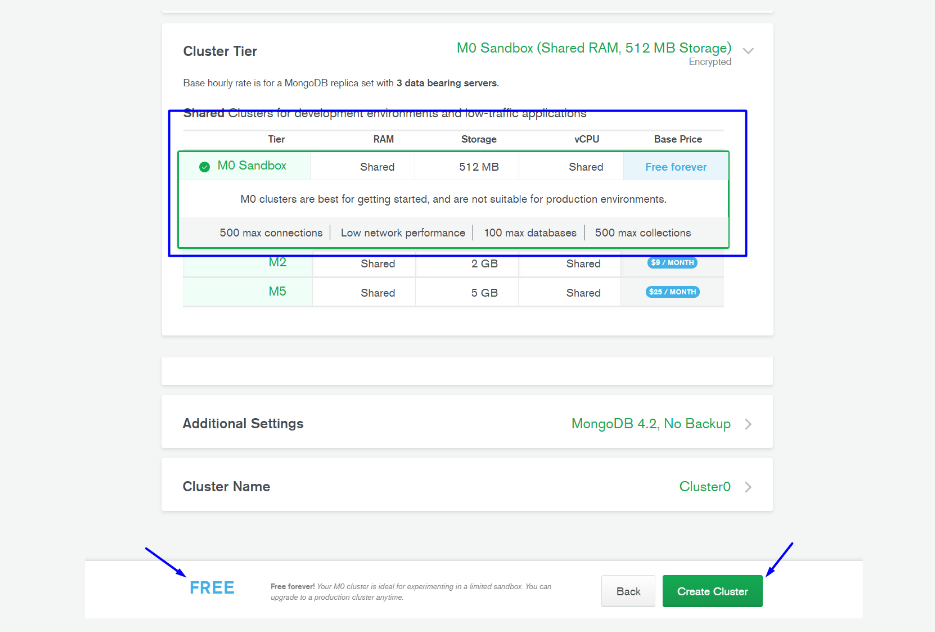
3. Select the Cluster tire and create a Cluster. Mostly all the free options will be selected already (if it is a new account or you don’t have any clusters running) just make sure the M0 Sandbox is selected.

4. Create a user for Database Access. On the left sidebar under “SECURITY” click on Database Access.


5. Add New User

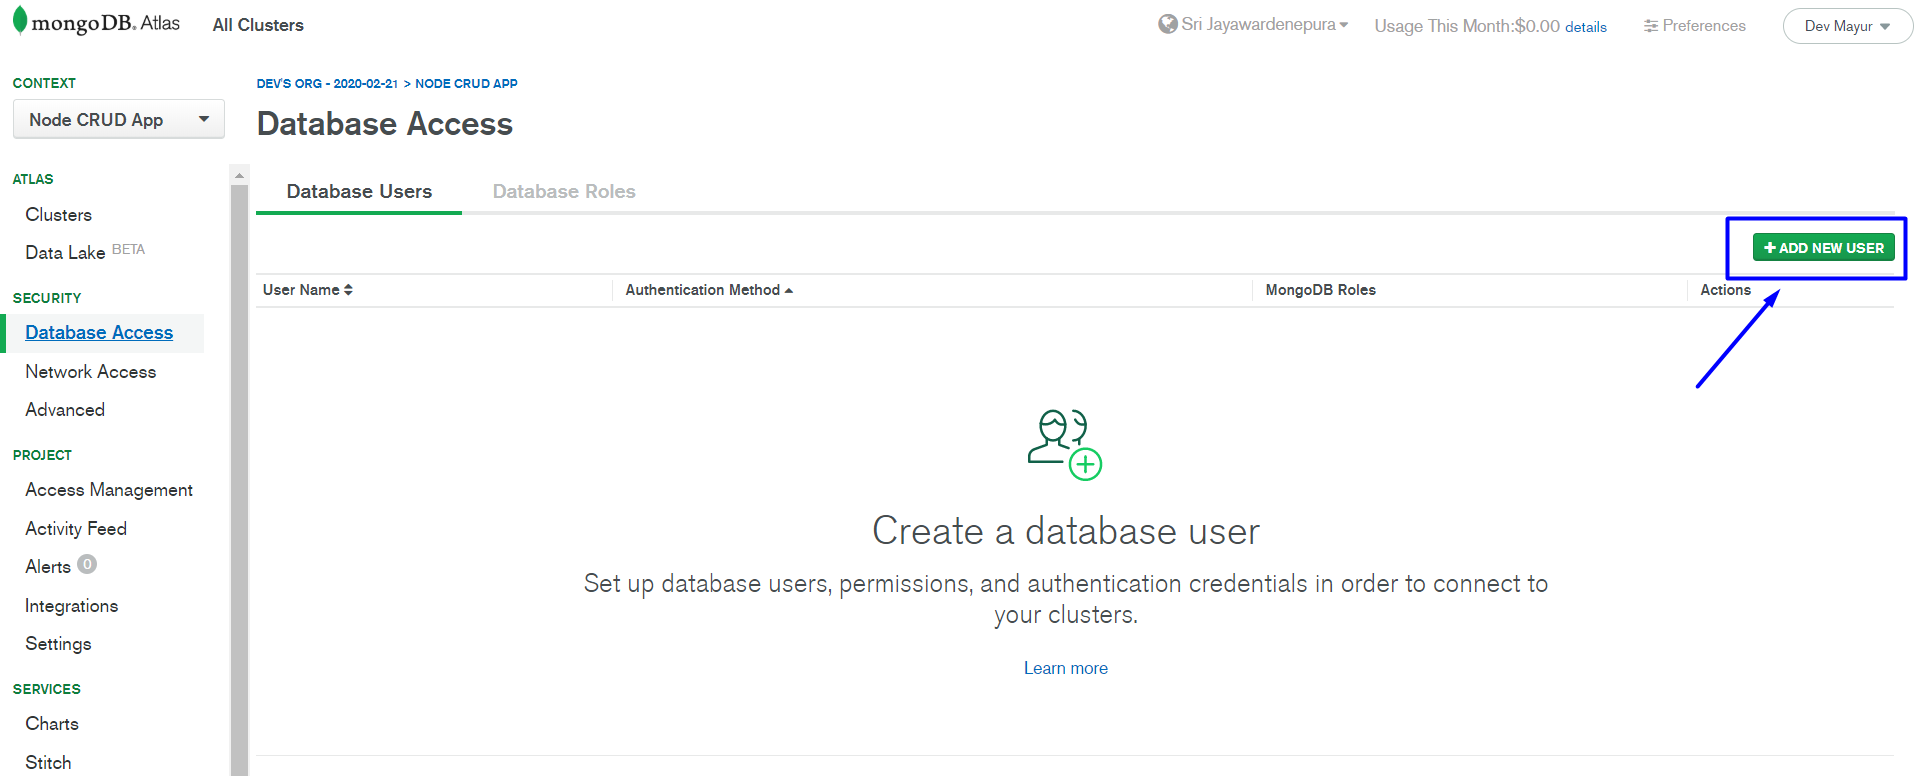

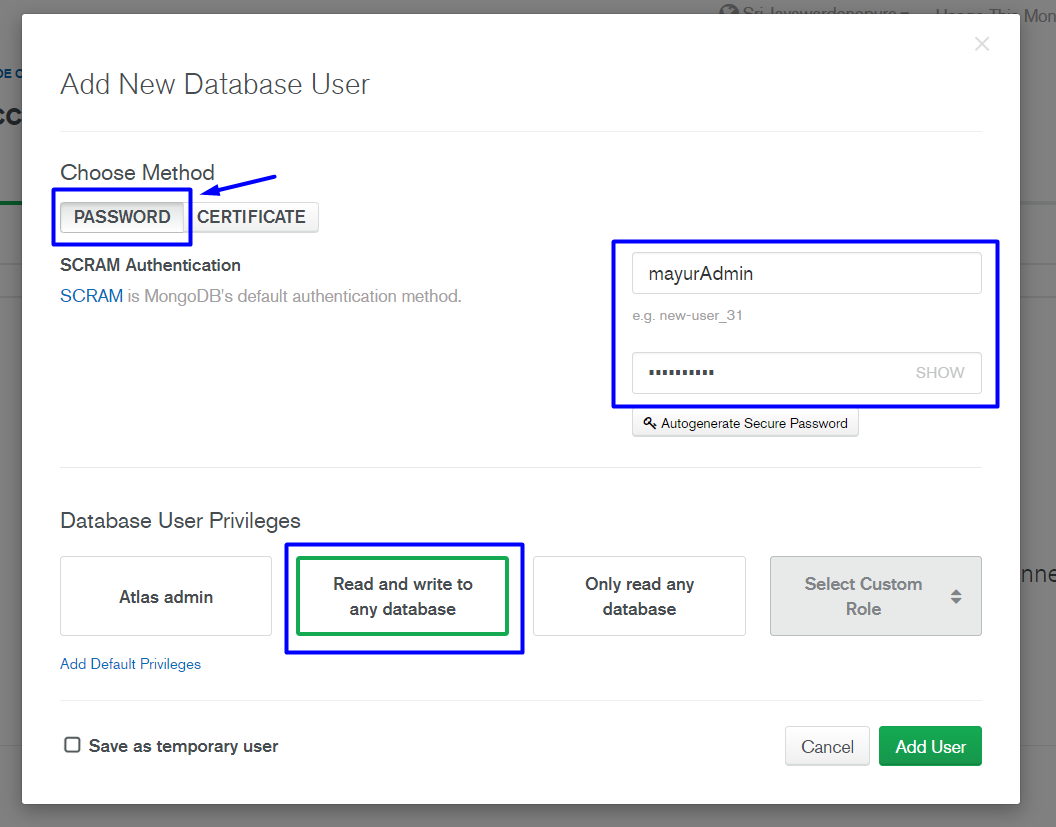
Please remember the username and the password as we will be using it for our Cluster and DB connection.
6. Install MongoDB Compass GUI tool to manage our Database.
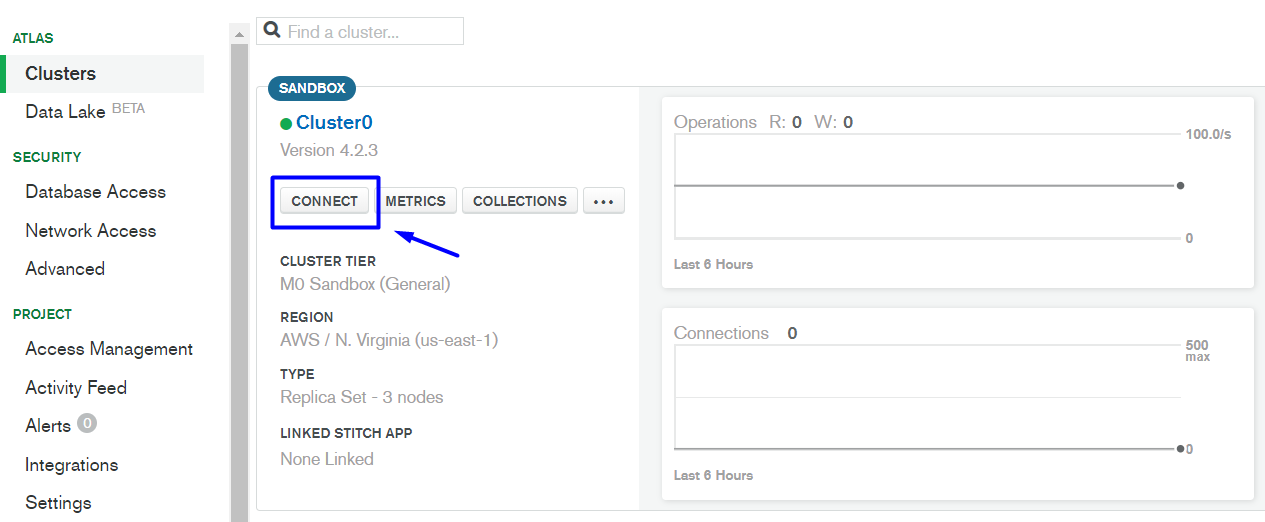
7. Once your cluster is ready, click connect.

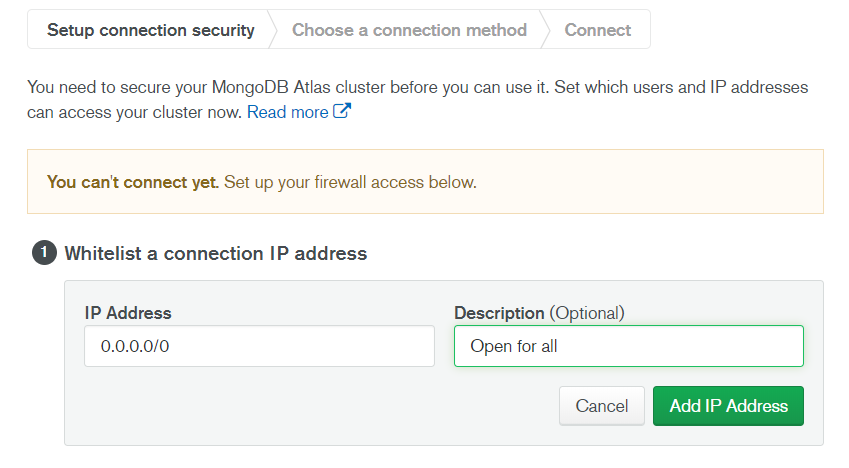
First, we need to do some firewall setting so that our DB is accessible to multiple IP’s.

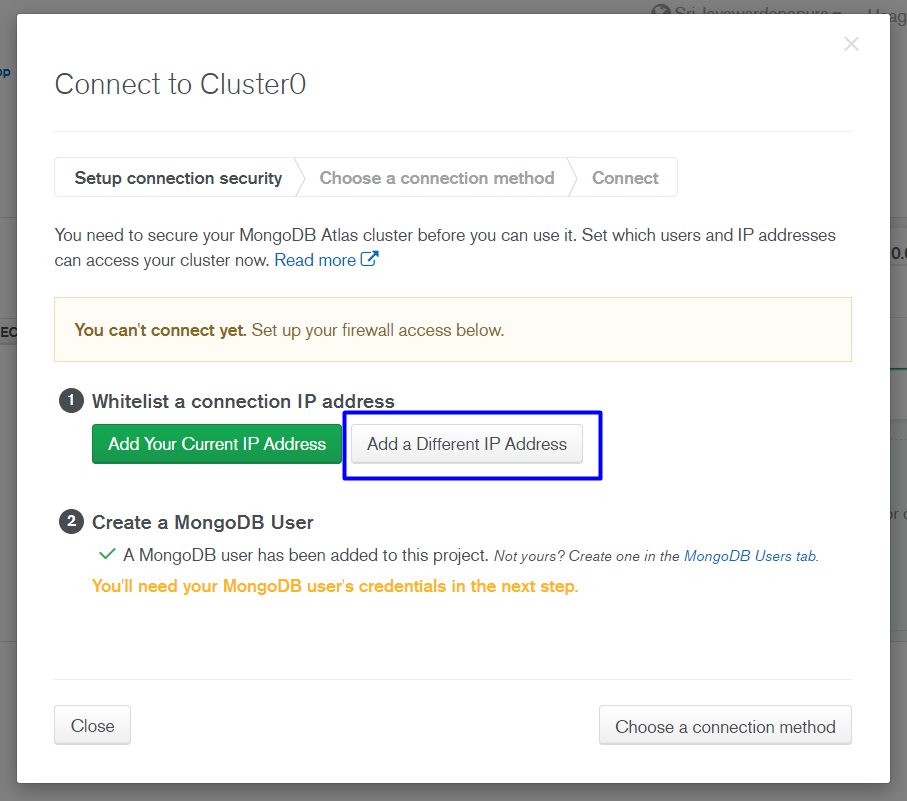
Select Add a Different IP Address and type 0.0.0.0/0, this will allow access to all the IP’s.

After adding the IP address, we choose a connection method.

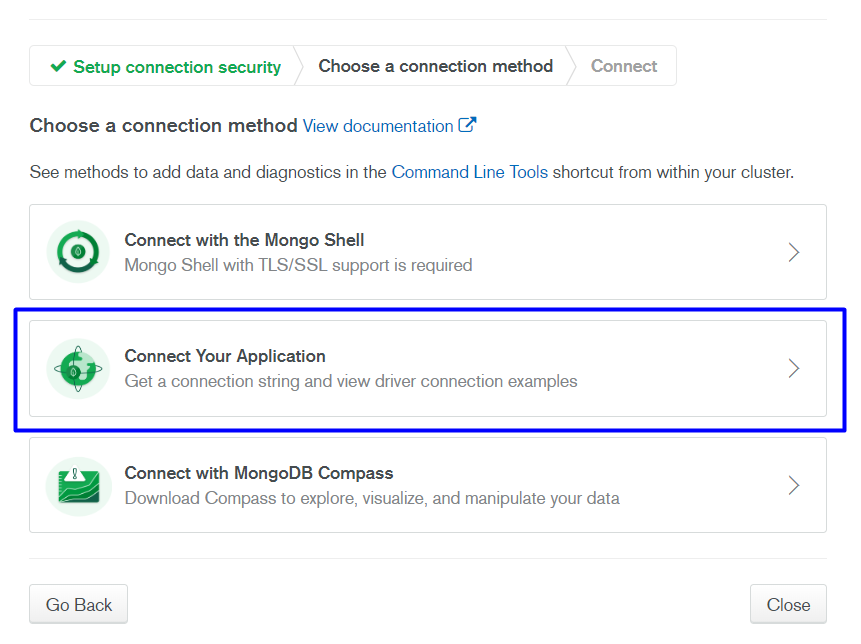
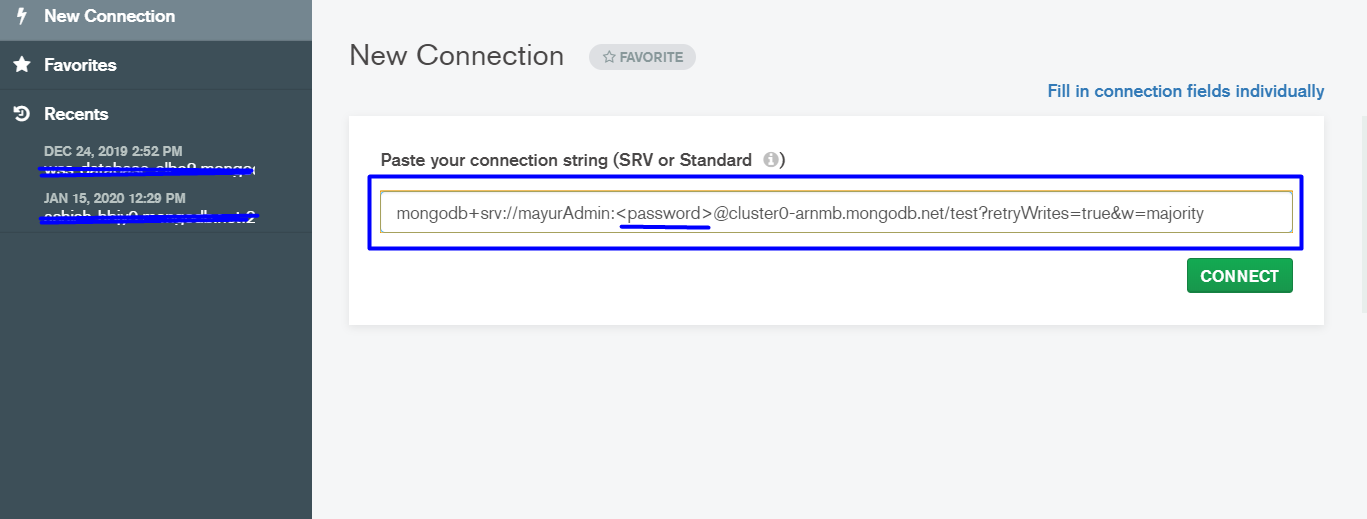
Select the 2nd option, this will give us a connection string which we can use in the Compass GUI and our application.

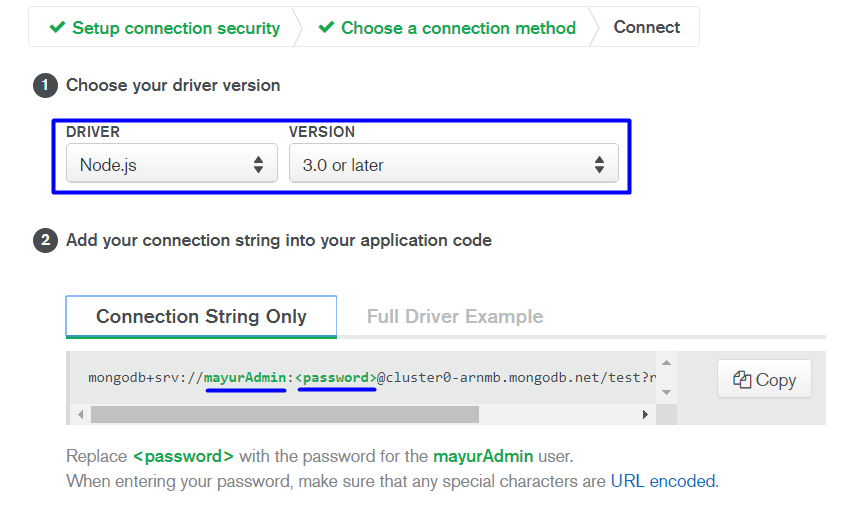
We can configure the connection URL as per our application. As we are working in Node.js, we choose the drivers as shown above.
Paste the URL in the Compass GUI Tool and replace the <password> with the password we created while creating a user for the DB access and click connect.


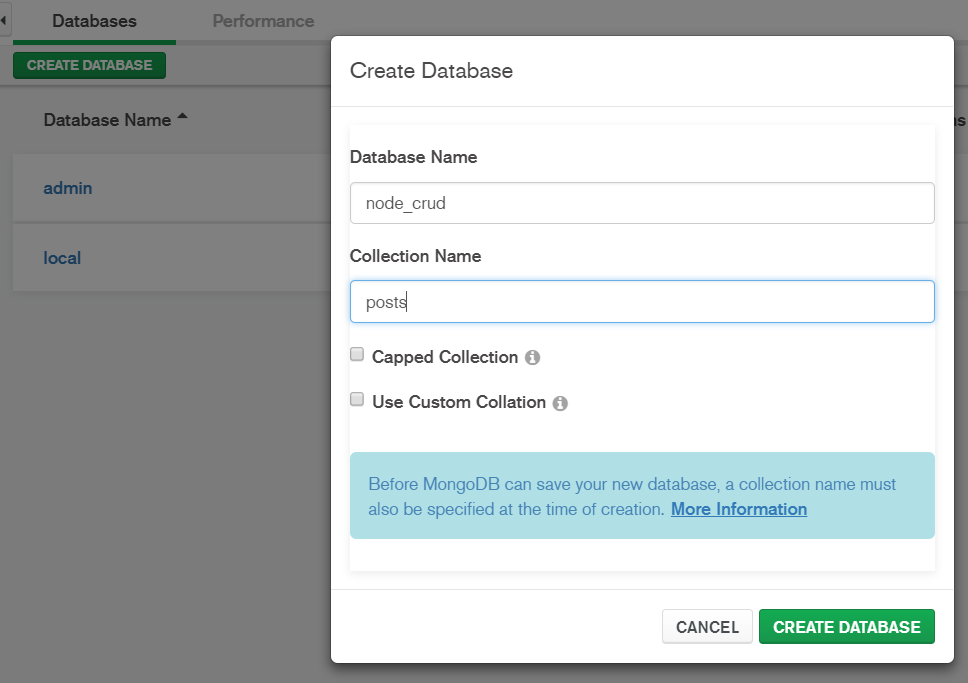
Note: One important thing to notice here is the Connection URL. By default, MongoDB creates a “test” database in our cluster. Next, we will create a database called “node_crud” and replace it with “test”.
Creating our Database:
- Open Compass and connect to your cluster. You can find your recent connection on the left sidebar.
- After connecting, create a new database “node_crud” and a new collection “posts”

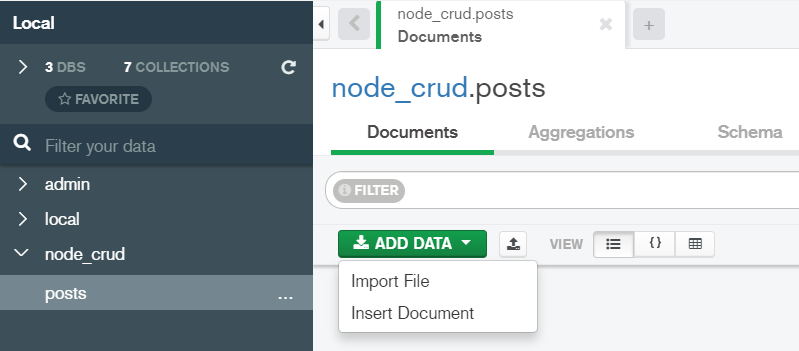
3. We will add some dummy data in our collection. Click on “node_crud” and then click on “posts” collection.
4. Inside posts collection, we will insert documents.


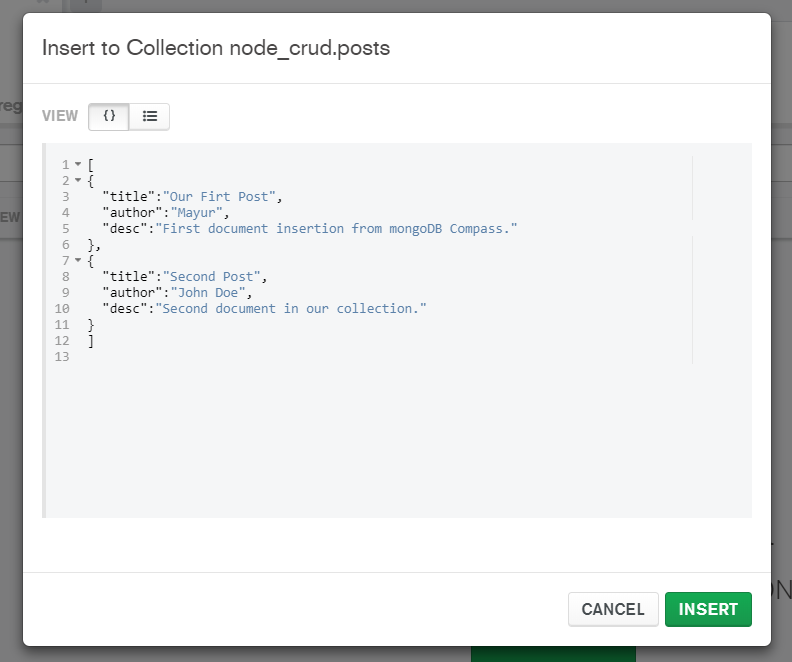

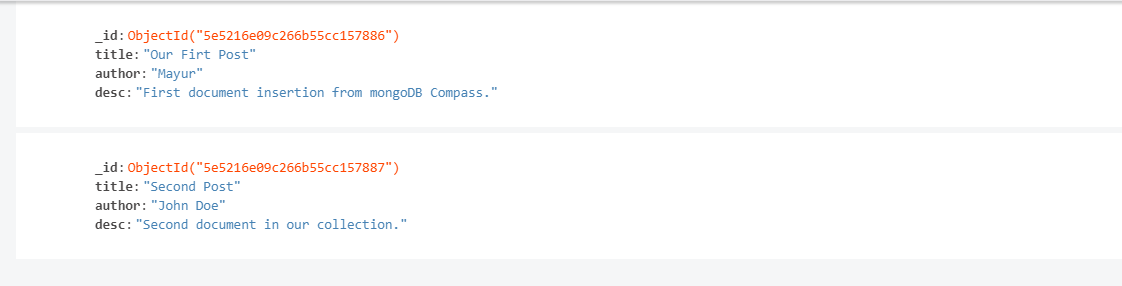
5. now we have 2 documents (or tuples) in our database collection (i.e table).
Connecting our Node Application to the database:
Next, we will connect our node application to our database and create our first route to get the two documents from our posts collection.
- in the .env file create a variable DATABASE and assign it to the DB connection URL. Make sure you add your password and replace test with node_crud in the connection URL.


2. next we will configure our server.js file for our DB Connection. Open your terminal and run the following command “npm i mongoose dotenv”. mongoose is used to connect to our MongoDB and dotenv is for reading our env file.
next, configure the server.js file as follows.

Creating our first GET API:
Before we create the first route and query our collection, we will be creating our Schema.
A Schema is a JSON object that allows you to define the shape and content of documents and embedded documents in a collection.
We use schema to tell our application what type of data to expect and we use the schema to read and write data from a collection.
open “app.js” and do the following changes :

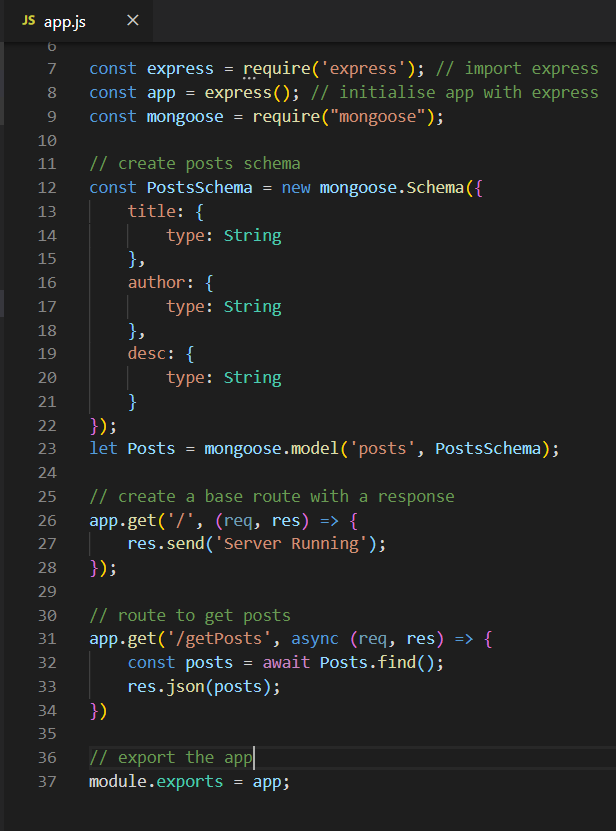
first, we require “mongoose”, this is to create our schema.
next, we declare a constant and create our schema with “mongoose.Schema”.
The title, author and desc are the properties of our document (created while inserting dummy data above).
next, we create our model using “mongoose.model” and pass the collection name and our schema as the parameters.
and finally, we create our route “/getPosts”.
// route to get posts
app.get('/getPosts', async (req, res) => {
   const posts = await Posts.find();
   res.json(posts);
})
in the get() method, we pass the route “/getPosts” as the first parameter and the second parameter is a callback function.
with the find() method we query our database using our schema and assign it to a variable.
and finally, we send the variable as a JSON response using res.json() and that is it, you have your first REST API ready.
run “npm start” on your terminal and go to the getPosts route http://localhost:3000/getPosts and you will get the posts collection data in a JSON format.


In the next articles, we will structure our application in a proper MVC format and build the rest of our application.
If you have any queries feel free to write it down below, I will try my best to solve all the queries possible. Also, please leave a clap (or more :P) if this article helped you.
Comments
Post a Comment